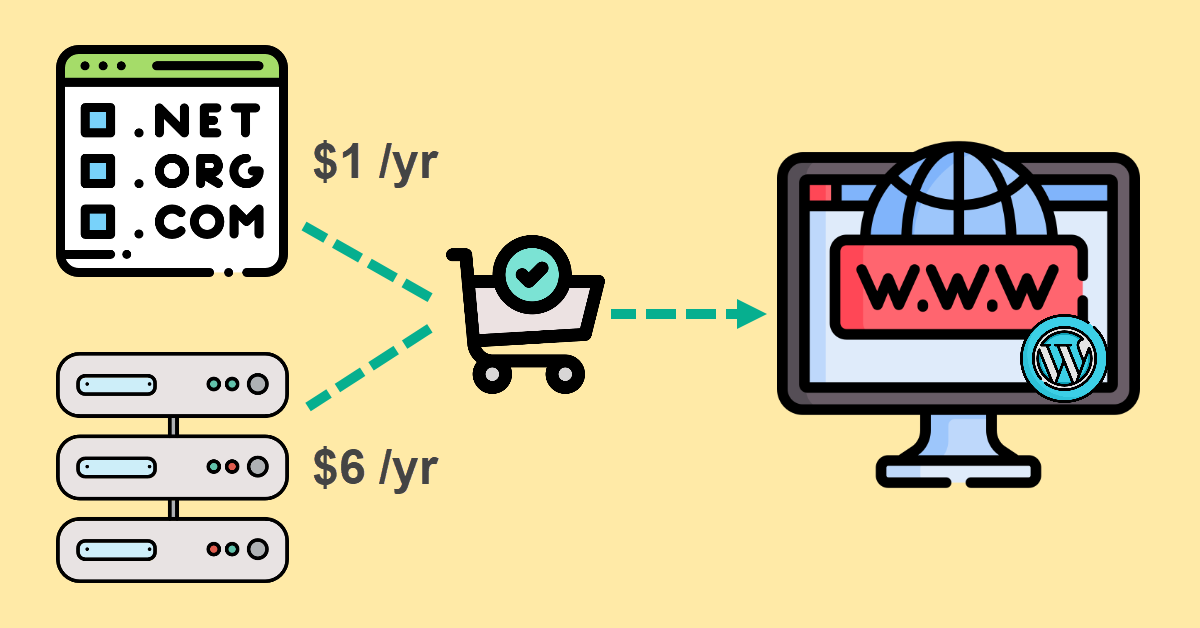
Do you know the difference in service provided between wordpress.com vs wordpress.org? You can register for a free hosted blog at wordpress.com with limited features or you can subscribe to their paid plans to unlock them. However, at wordpress.org, you can download and host WordPress yourself with your preferred domain for just $7 annually.
Step 1 – Brainstorm and Buy your Domain for $1/yr
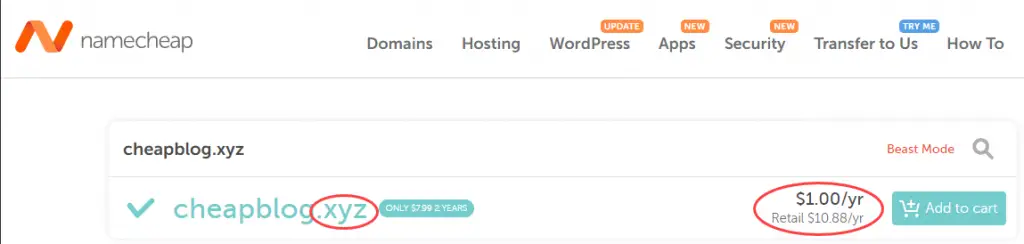
There are many domain providers online hence I will leave it to you to find the cheapest price for your preferred domain after your brainstorming. An example is .xyz domains that cost only $1 for the first year at Namecheap.
Step 2 – Subscribe a Hosting Plan at $6/year
Both cPanel and DirectAdmin are graphical web-based user interface (UI) designed to let you administer your websites with ease. Plans that come integrated with cPanel are expensive these days after it’s company revised their pricing model in 2019. Hence, your next bet is DirectAdmin.
You can find shared hosting offers at LowEndTalk. This is where I managed to sign up a cPanel hosting package from Gullo’s Hosting at $6/yr before the price increase. While it still cost $6/yr for new subscriptions, all web hosting plans now come with DirectAdmin instead.
Step 3 – Associate your Hosting Space with your Domain
In this tutorial, I will use both cPanel and Namecheap as an example to show you how to link a new domain to a hosting provider. This is so that when you visit your domain from any browser, the Internet will know where to find your WordPress blog installation.
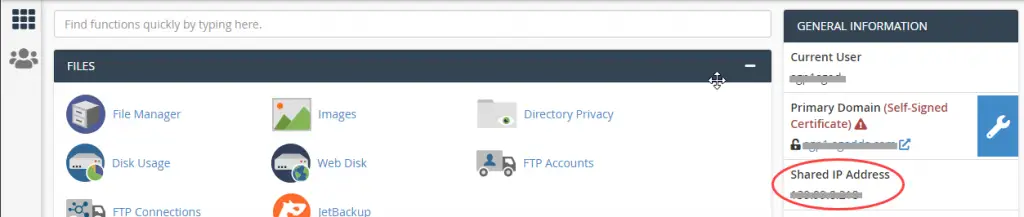
You will receive your cPanel or DirectAdmin login details from your hosting provider, usually via email. Now, login to your cPanel account and find your Shared IP Address under GENERAL INFORMATION. Take note of the IP e.g. 130.88.9.218
Next, login to your Namecheap account. Navigate to the Domain List and click MANAGE on your domain. Ensure that the NAMESERVERS is Namecheap BasicDNS before clicking Advanced DNS. Next click + ADD NEW RECORD to add a A Record entry.
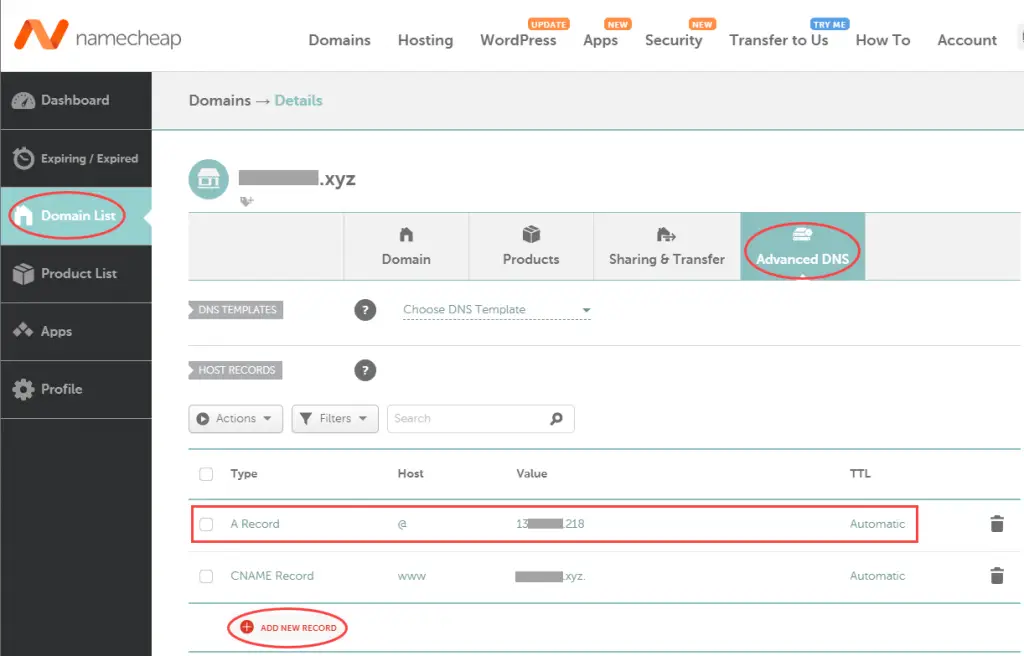
Type – A Record | Host – @ (represent a root domain e.g. cheapblog.xyz) | Value – (your IP) e.g. 130.88.9.218 | TTL – Automatic
(optional) You can add a CNAME Record if you prefer ‘www’ in the URL e.g. http://www.cheapblog.xyz
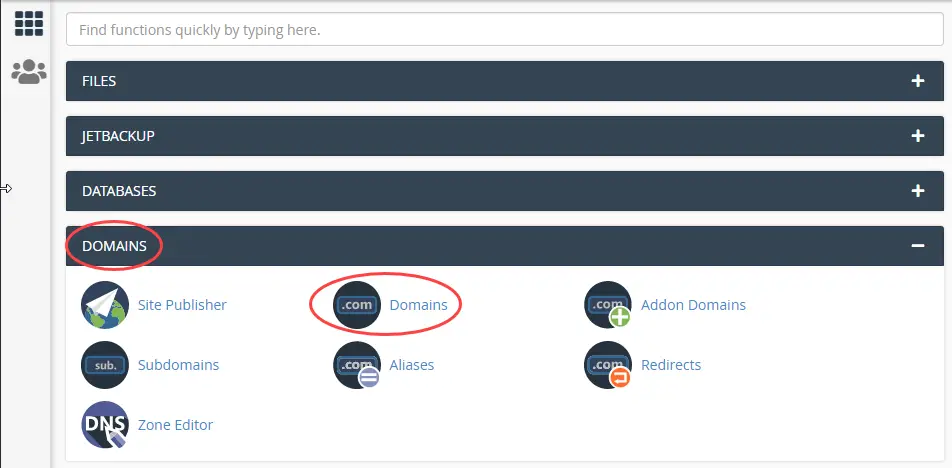
Step 4 – Create your Domain in cPanel before Install WordPress
While still in cPanel (Step 3), click Domains under DOMAINS section. Next, click CREATE A NEW DOMAIN
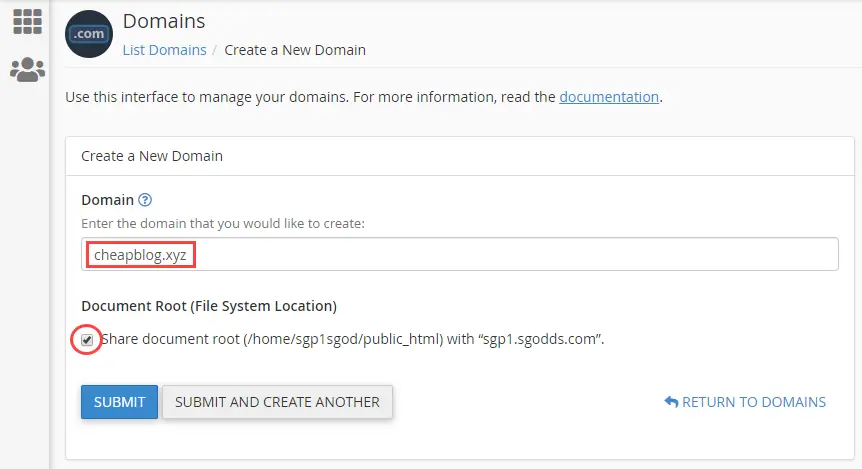
Domain – Enter your domain e.g. cheapblog.xyz
Document Root (File System Location) – Check it if you plan to install WordPress only. Uncheck it if you want to install and try other software under SOFTACULOUS APPS INSTALLER later on.
Click SUBMIT
If Share document root is left unchecked, different software will be installed into their own individual directory. For example,
- (/home/user/public_html/cheapblog.xyz) – Main WordPress site on cheapblog.xyz
- (/home/user/public_html/secondwp.cheapblog.xyz) – Second WordPress site on sub-domain secondwp.cheapblog.xyz
- (/home/user/public_html/photos.cheapblog.xyz) – Photo gallery on sub-domain photos.cheapblog.xyz
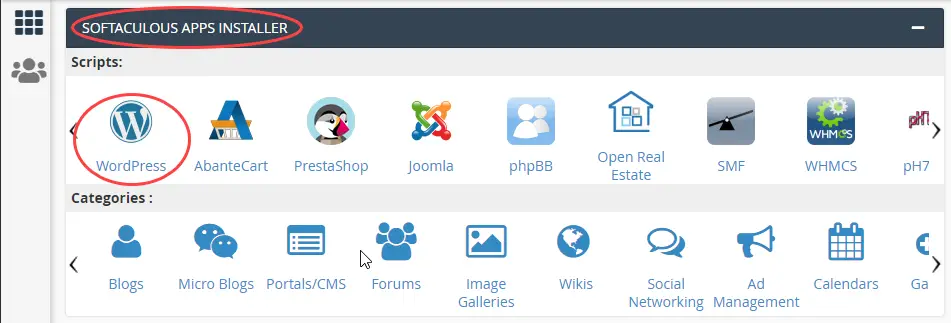
Step 5 – Install WordPress
Click WordPress under SOFTACULOUS APPS INSTALLER.
Next, click Install Now and fill up the installation form.
Software Setup
Choose the version you want to install – Use latest e.g. 5.4 at the time of writing
Choose Installation URL – [http:// or http://www.] [cheapblog.xyz] [leave empty]
Site Settings – You can leave it as it is because you can change Site Name and Description in WordPress Admin instead.
Admin Account – Your WordPress Admin login credentials after your initial installation. You still can change password and add new users later on.
Select Plugin(s) – Uncheck all because you can add plugins from WordPress Admin.
Advanced Options – WordPress database setup (you can leave it as it is)
Select Theme – This is optional. If not selected, the default theme will be installed. However, you can always add new themes from WordPress Admin.
Finally, click Install
Step 6 – Login to WordPress Admin from your Browser
Open your browser and visit https://cheapblog.xyz/wp-admin. Remember to replace cheapblog.xyz with the domain you purchased. Your login credentials is from Admin Account in Step 5 .
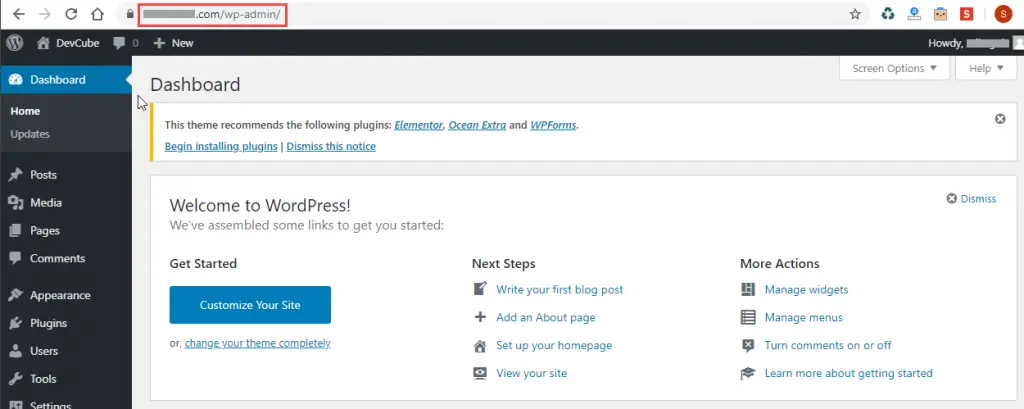
Your blog will be located at your domain e.g. cheapblog.xyz but you should always visit WordPress Admin at /wp-admin to check out all the exciting stuffs e.g. update your Site Name. You do have to write your first post from within!
Conclusion
It might be little mind-blowing to go through all these steps to setup a self-hosted WordPress even though it only costs $7/yr. There is a slightly simpler method and that is to sign both the domain and hosting plan under the same provider. Namecheap is one such provider that sells shared hosting plans (include domain name) for $1.44/month at the time of writing. This provides the convenience of having a single account to manage both your domain and hosting.
Take a break now or start racking your brains to think of some content for your first post!