Introduction
My DevOps learning roadmap says “learn some CI/CD tool” and so I picked up Jenkins – an open source continuous integration and continuous delivery automation server. Although I am already using GitLab to keep track and backup my source codes but I have not tried their CI / CD feature. I chose to learn Jenkins because it is a focused CI/CD tool by nature. This tutorial will demonstrate how to install a Jenkins docker container behind jwilder/nginx-proxy and create a pipeline with source from GitLab repository. Thereafter, we will run a test build in a docker environment successfully.
Prerequisites
- Sign up for a free GitHub, GitLab or Bitbucket account. Note that GitHub had announced unlimited private repositories since 2019.
- A virtual machine (VM) with Docker installed to run Jenkins (v2.235.5) container.
- Basic understanding of Git commit, push and clone command and Docker Compose (YAML file) to run Jenkins container.
- (optional) A domain name to run Jenkins or else we will just use public IP on the VM.
Step 1 – Install Jenkins with Docker Compose
Login to our VM and create a project directory for the Jenkins docker-compose.yml file. The image pull can be jenkinsci/blueocean or the (official) jenkins/jenkins:lts from Docker Hub. Blue Ocean is an enhanced themed Jenkins that allows users to graphically create, visualize and diagnose Continuous Delivery (CD) Pipelines. We will use jenkinsci/blueocean because we can always switch back to classic UI within it.
version: '3.7'
services:
  jenkins:
    #image: jenkins/jenkins:lts
    image: jenkinsci/blueocean
    container_name: jenkins-docker
    user: root
    environment:
      - VIRTUAL_HOST=jenkins.example.com
      - VIRTUAL_PORT=8080 # This 1 liner will work without expose: or ports:
      - LETSENCRYPT_HOST=jenkins.example.com
      - LETSENCRYPT_EMAIL=youremail@gmail.com
    volumes:
      - ./jenkins-data:/var/jenkins_home
      - /var/run/docker.sock:/var/run/docker.sock:ro

volumes:
  jenkins-data:

networks:
  default:
    external:
      name: nginx-proxy
By default, Jenkins runs on port 8080, for example, http://localhost:8080, this explains why we use VIRTUAL_PORT=8080 to inform nginx proxy. The other important line is user: root which allows Jenkins access to /var/run/docker.sock owned by root. If not, we will get the build error: Got permission denied while trying to connect to the Docker daemon socket at … dial unix /var/run/docker.sock: connect: permission denied

Step 2 – Setup Jenkins and Docker
From Step 1, we had install Jenkins to jenkins.example.com so we will now access this URL from our browser. On first load, it will request for initial admin password which can be discovered by accessing the Jenkins container.
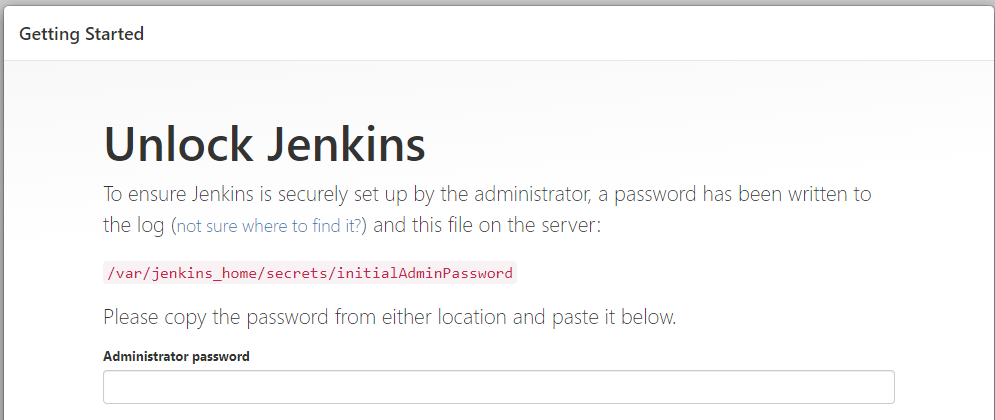
$ docker exec -it jenkins-docker bash
bash-5.0# cat /var/jenkins_home/secrets/initialAdminPassword
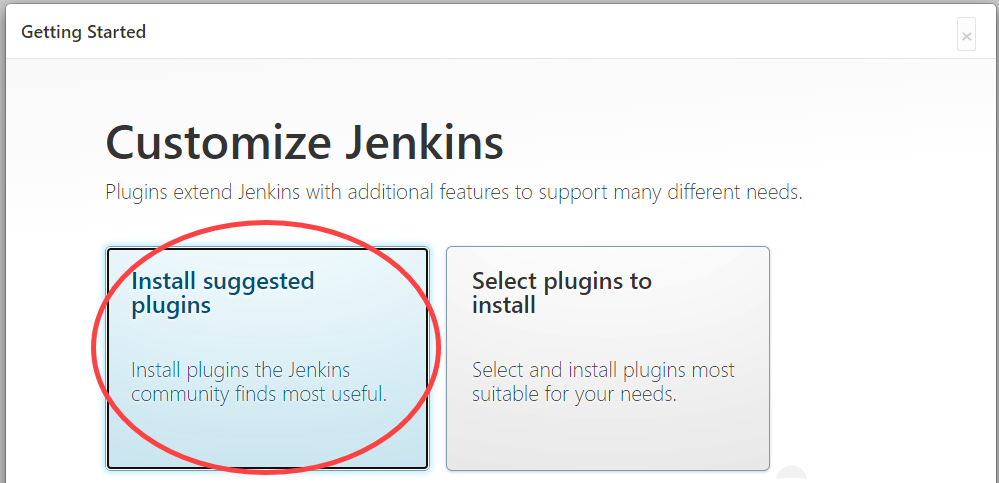
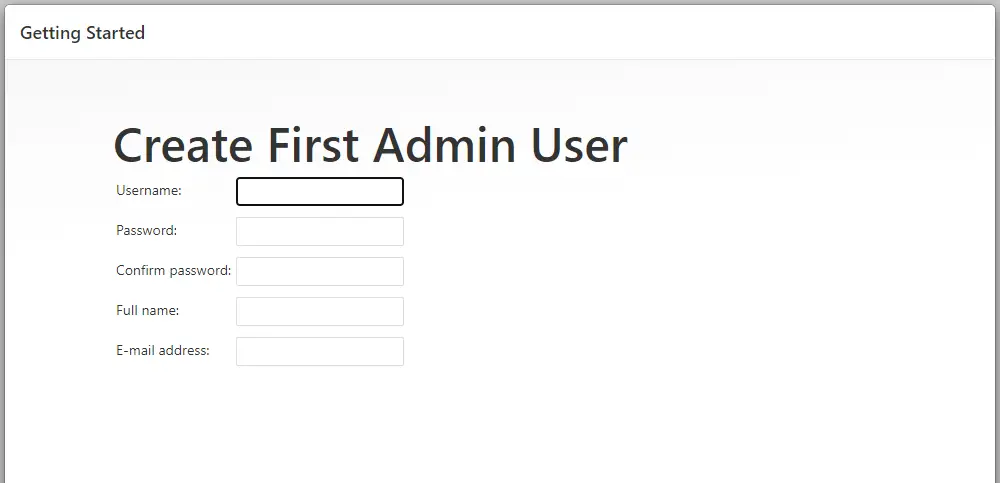
3fa0f064a3d34cb2b0ff42030cd79350Next, click Install suggested plugins and go ahead to Create first Admin User. The ‘Unlock Jenkins’ web page (above) will go away after an admin user is created.
Docker
Why do we need to install Docker in our Jenkins container? Well, this is because we are going to run a Jenkinsfile project (Step 3) to pull docker images for the build environment or else the build console will fail with this error: script.sh: docker: not found
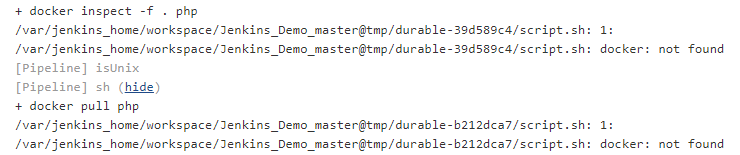
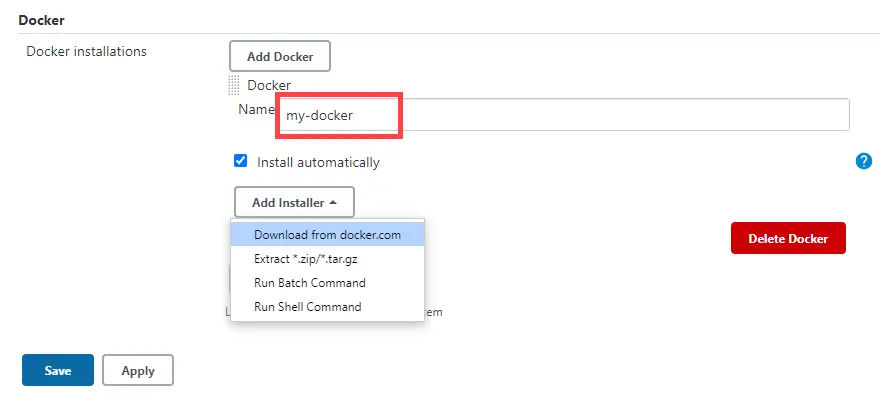
To resolve this, we can either remote into to our Jenkins container to install Docker or we can simply add it from within the UI, Jenkins > Global Tool Configuration page which is more convenient. Give a name to the Docker installation (e.g. my-docker) but we will not be utilizing it for our Jenkins sandbox demo.
Step 3 – A Simple Jenkinsfile
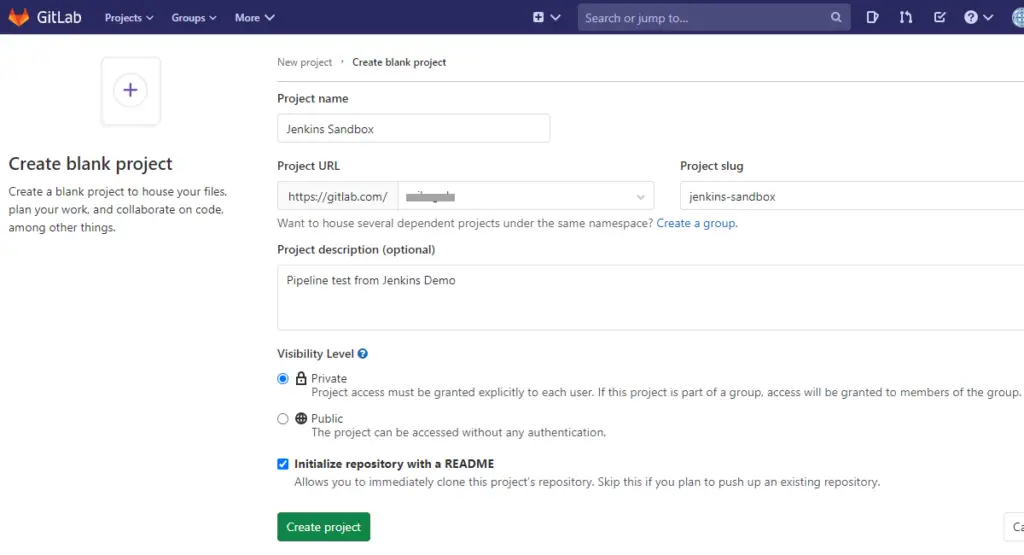
Log in to GitLab and create a blank project. Called it ‘Jenkins Sandbox’.
Create a new file called Jenkinsfile with your code editor and copy below codes. What these few lines of codes does is to pull a docker PHP image as the execution environment for a single Stage or the entire Pipeline. Then as part of the ‘build’ stage, we execute the command php –version
// https://www.jenkins.io/doc/pipeline/tour/hello-world/
pipeline {
    agent { docker { image 'php' } }
    stages {
        stage('build') {
            steps {
                sh 'php --version'
            }
        }
    }
}
If for whatever reason, the build is unsuccessful due to Jenkins not able to find Docker, then we will need to manually specify the env.PATH to our installation. This also shows how we can write a ‘Initialize‘ stage before the ‘build’ stage in a Jenkinsfile. Note that tool ‘my-docker’ is the Docker installation name we used in Step 2.
pipeline {
    agent any
    stages {
        stage('Initialize') {
            steps {
                script {
                    def dockerHome = tool 'my-docker'
                    env.PATH = "${dockerHome}/bin:${env.PATH}"
                }
            }
        }
        stage('build') {
            agent {
                docker { image 'php' }
            }
            steps {
                sh 'php --version'
            }
        }
    }
}
Step 4 – Create a Multibranch Pipeline
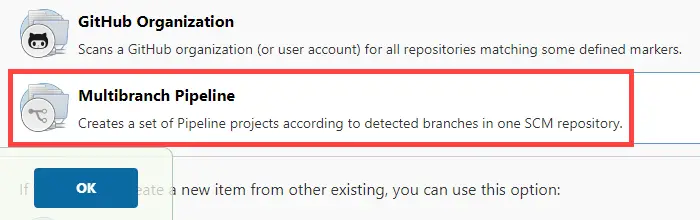
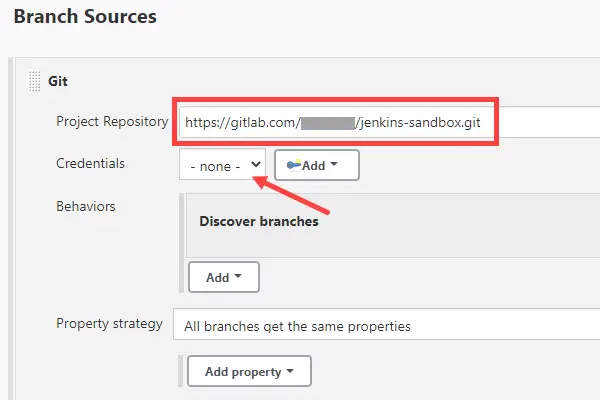
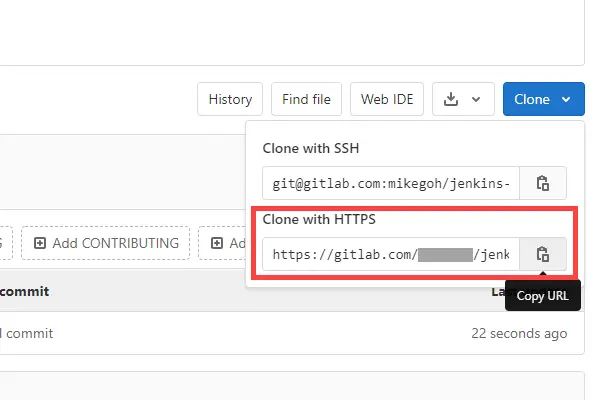
From Jenkins home page, click New Item > Multibranch Pipeline and enter a name, for example, ‘Jenkins Demo’. Then scroll down to Branch Sources > Add source > Git and fill in the Project Repository with the URL found in GitLab ‘Clone with HTTPS‘ as shown in the second picture. Next, we add a set of Global credentials which is basically our GitLab username and password.
Step 5 – Build Now!
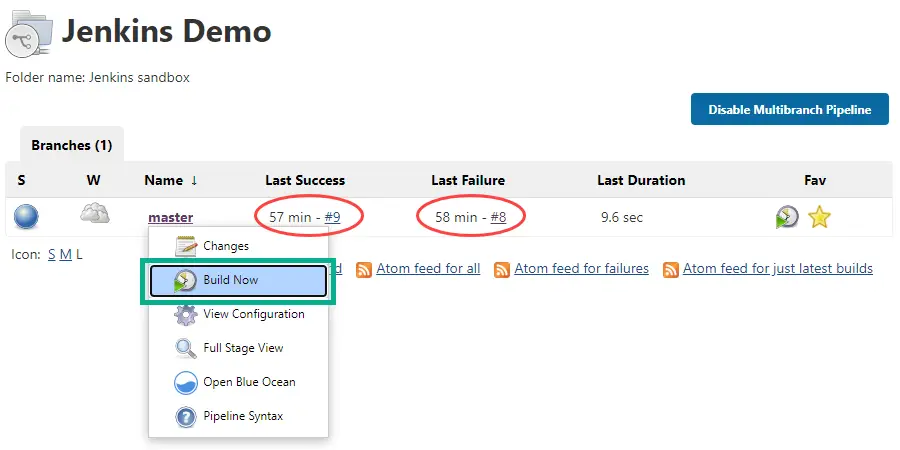
Go to our Jenkins Demo, click the drop-down next to the master branch and select Build Now. As we develop and build over and over again, the Success and Failure #counter will increase. Click on either of the counters and view Console Output to check the status of the latest build.
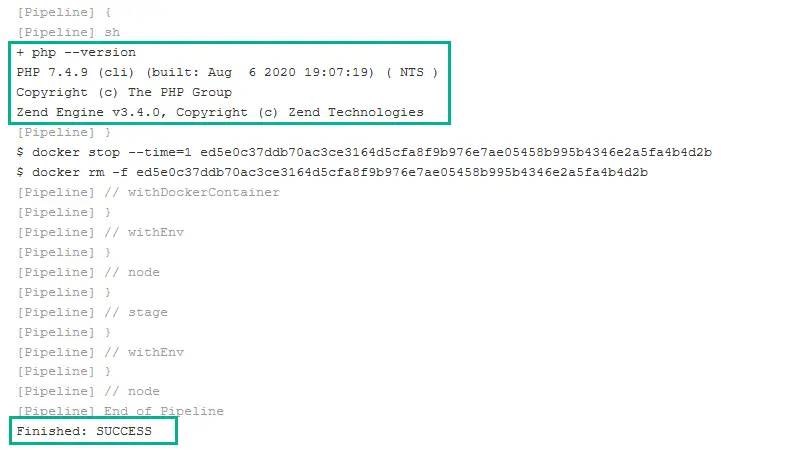
If all the steps in this tutorial were followed closely, the console output will return the PHP version (7.4.9 at the time of this writing) and Finished: SUCCESS.
Conclusion
In my own words, I would think that Jenkins is a software that allows the developer to build and test his/her codes in a controlled environment, such as within a Docker container. Then there is the ‘logging’ function where every build result, regardless success or failure are archived for reviewing purposes. I am unsure how relevant is Jenkins now as GitHub Actions and GitLab CI both has their own built-in CI/CD feature. But surprisingly, a quick search on my local job portal found: 265 jobs with keyword ‘Jenkins’, 49 jobs with ‘GitHub’ and 33 jobs with ‘GitLab’. I’m not finished with Jenkins yet as I hope to learn to utilize it for my daily code development soon and will probably write another article on how to do it.