Introduction
Any web application that is important to you can be secured by adding 2FA in addition to the standard login username and password. To hide the app’s vulnerabilities, one could restrict access with Nginx HTTP basic authentication, which will stop hackers from ever loading the login page, hence not knowing what application was deployed. Cloudflare Zero Trust is a security model based on maintaining strict access controls and not trusting anyone by default. I recently learned that Zero Trust could be set up to send an email with the login code to secure websites, which I implemented on a Rancher dashboard designed for the K3s cluster.
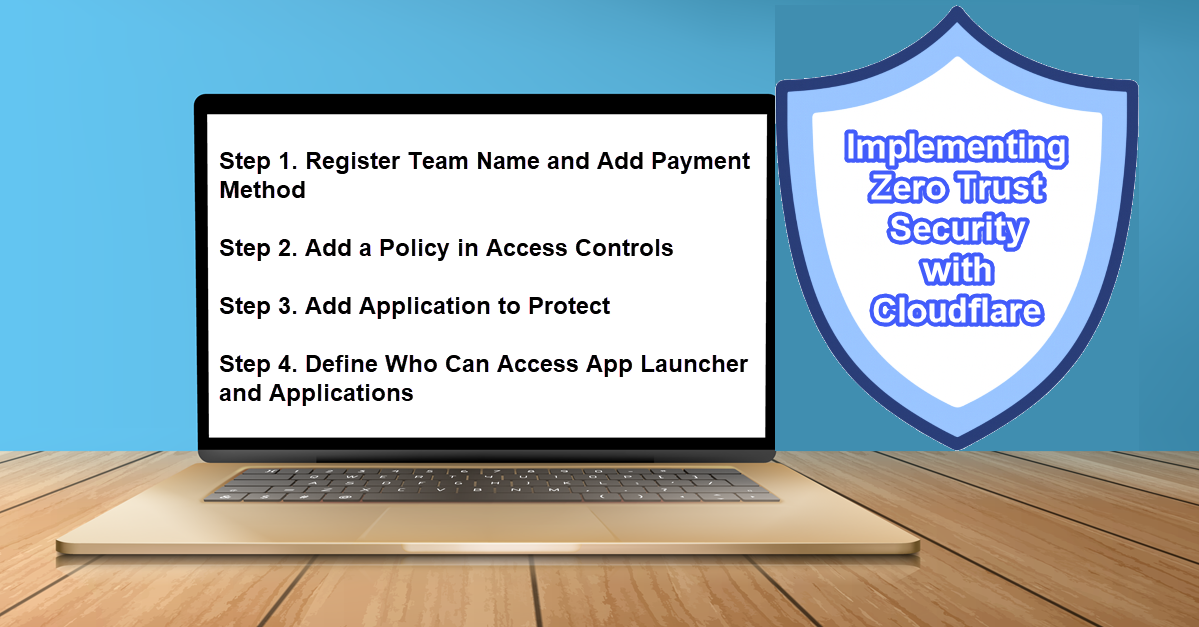
Step 1. Register Team Name and Add Payment Method
After logging into your Cloudflare account, select Zero Trust from the vertical menu on the left. Enter a required payment method and a unique team name. I went with PayPal and chose the $0/month Zero Trust Free plan type. You can leave all other settings at their default settings.
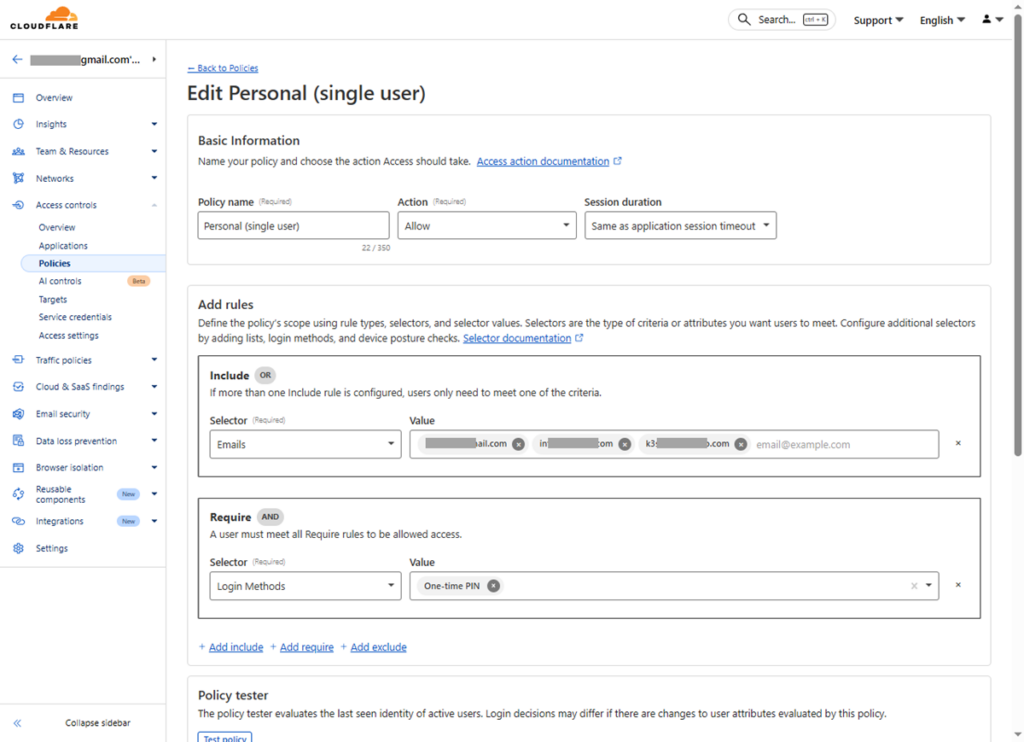
Step 2. Add a Policy in Access Controls
Go to Access controls > Policies > + Add a policy
Since I am using Zero Trust for myself to secure a website that I use exclusively, I will set up a personal single-user policy. Except for these below, other settings are optional or can be left at default:
- Policy name: Personal (single-user)
- Action: Allow
- Session duration: Same as application session timeout
- Add rules > Include: Selector = Emails | Value = email1@gmail.com, email2@hotmail.com, email3@example.com
- Add rules > Require: Selector = Login Methods | Value = One-time Pin
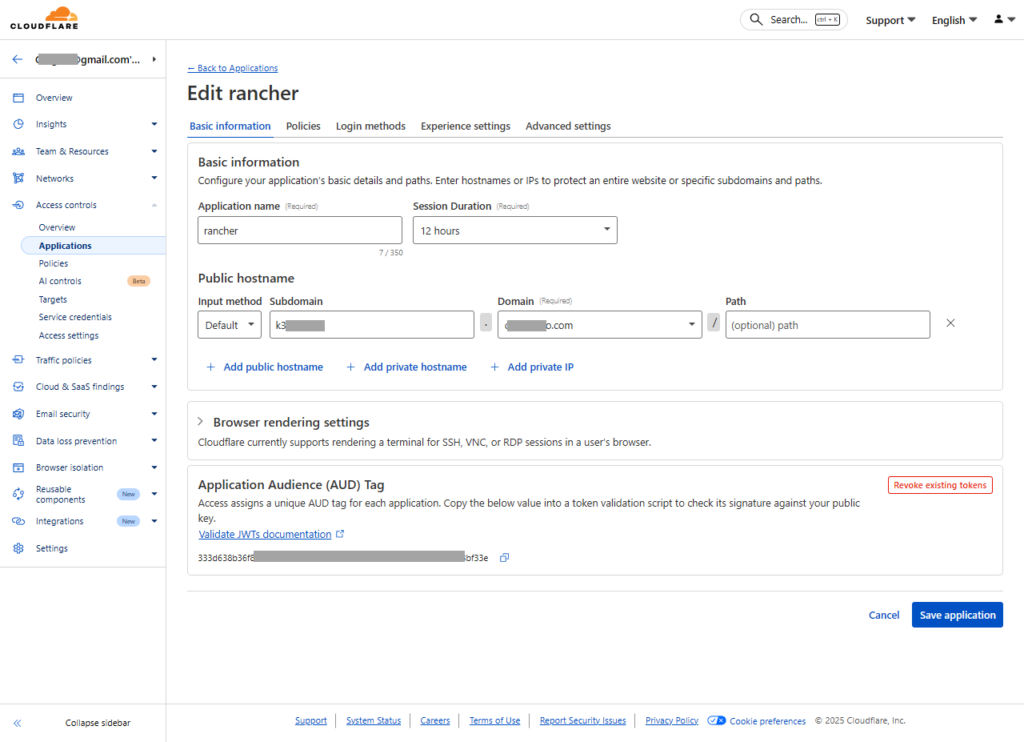
Step 3. Add Application to Protect
Enter the URL of the application you wish to use Zero Trust to secure. Except for these below, other settings are optional or can be left at default:
- Application name: my-application
- Session Duration: 15 min, 30 min, 6 hrs, or 12 hrs … (remember in Step 2. the policy here depends on the application)
- Public hostname: Input method = Default | Subdomain = application-123 | Domain: (must be under Cloudflare Domain Management)
- Policies tab: Select existing policies = Select the policy created in Step 2. (Note that after adding a policy here, any changes made to Step 2. Access controls > Policies will not be updated; hence, one will need to re-select again)
- Login methods tab: Ensure One-time PIN is checked | Instant Auth = On | WARP auth identify = Off
Step 4. Define Who Can Access App Launcher and Applications
Go to Access controls > Access settings > Manage
Select existing policies: the policy created in Step 2. E.g., Personal (single-user)
Accept all available identity providers = Off
Login methods: One-time PIN
Instant Auth = On
Session duration = 15 min, 30 min, 6 hrs or 12 hrs
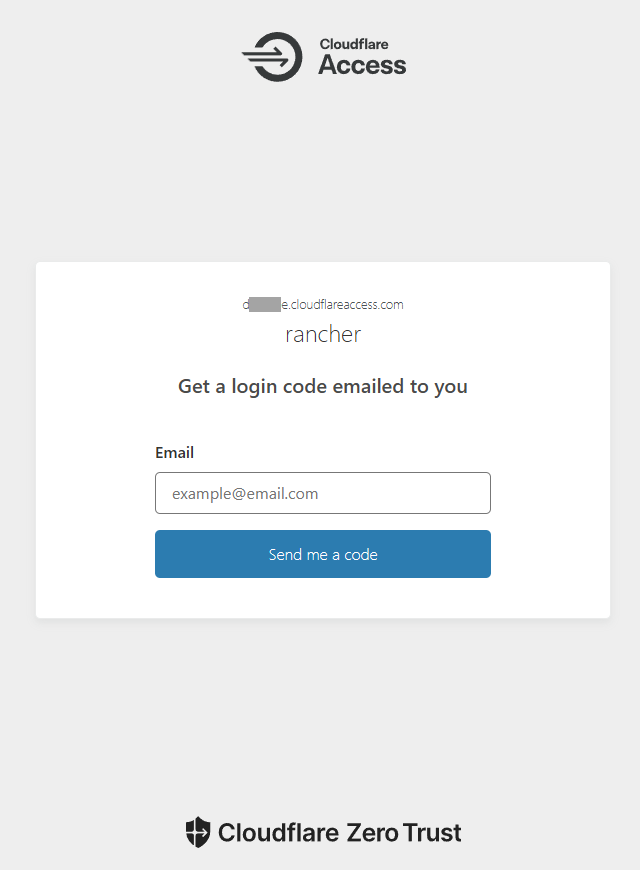
Testing Zero Trust
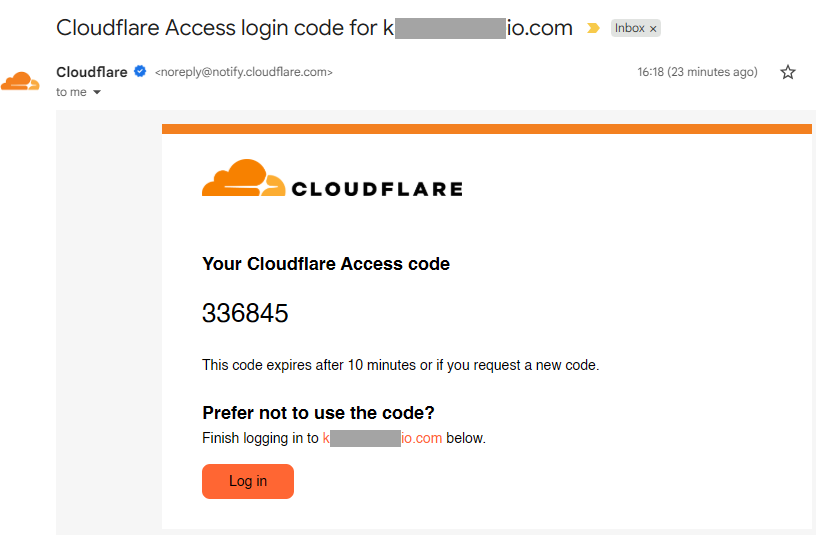
When you go to the application website, a page titled “Get a login code emailed to you” will appear. Enter any of the e-mail addresses you provided in the rule for Step 2. Add a Policy in Access Controls. Look for a Cloudflare email in your inbox, then enter the code to get to the application login page.
Conclusion
I have been using Nginx to implement restricted access with HTTP basic authentication for many years. The majority, if not all, are still with it because, should I ever misplace my phone, the thief could use my mail app to obtain the Cloudflare access code. I feel much more secure because I can remember the user and password when using HTTP authentication. However, there can be difficulties when using Docker apps with Nginx proxy to enforce HTTP basic authentication. For instance, when I click on the official Vaultwarden helm chart, nginx-ingress keeps popping up and requesting my username and password. Even though the likelihood is low, you might not receive the email with the access code in an emergency if there is a Cloudflare outage. Still, I’m glad I learned about this Cloudflare security service, and the best part is that it’s free.