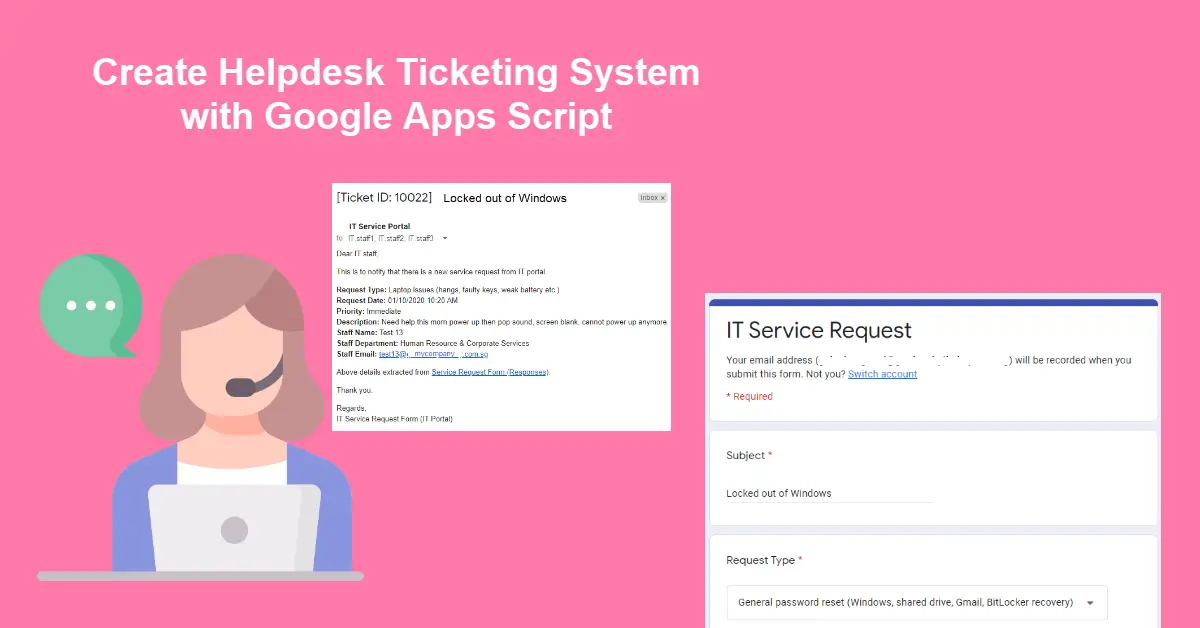
Introduction
When a business expands with increased headcounts, there will be more incoming IT helpdesk requests from its employees. There will always be this period of time where the single IT staff will have to answer phone calls, reply to emails and attend to staff walking over to his/her cubicle requesting for IT assistance. Later on, the company might add another one to two more headcounts to form an IT team. Then, everyone in the team get assigned a portion of the support requests. One day, the supervisor will ask the team how many support cases have they resolved recently and if there is a bulk of requests, he/she will further ask which category of problems is most common among staff so on and so forth. This is where a helpdesk ticketing system comes in handy and there are a few popular ones out in the market e.g., subscription-based Zendesk or self-hosted and open-source osTicket. However, in this tutorial, we will use Google Apps Script and Forms to create a simple support ticketing system. This is extremely convenient if the company is already using G Suite for business.
Prerequisites
- Google Forms to create a one-page form for staff to open ticket for their issues.
- Google Apps Script which is based on JavaScript language.
- Admin Google access to create new user (system) email for the ticketing system.
- (optional) Create a group email for the IT team unless one prefers to send to individual email (separated by comma).
Step 1 – Create Open Support Ticket Form with Google Forms
Give a title to your form e.g., IT Service Request. Description is optional. Next, go to Settings > General > check Collect email addresses. This way, we do not need to add additional question to ask for staff email and the remaining form is created based on the questions below. You may modify/add your own questions but remember, this might affect the Apps Script functions in Step 3.
- Subject – Short answer text (required)
- Request Type – Dropdown (required)
- General password reset
- Laptop issues
- Printer issues
- Software applications
- Ad hoc request (others)
- Priority – Multiple choice
- Immediate
- Description – Long answer text (required)
- Staff Name – Short answer text (required)
- Staff Department – Dropdown (required)
- Business Development
- Finance
- Human Resource
- Operations
- Others
Step 2 – Test Form and View Responses in Sheets
| Ticket ID | Timestamp | Subject | Request Type | Priority | Description | Staff Name | Staff Department | Email Address |
|---|---|---|---|---|---|---|---|---|
| 10001 | 10/8/2020 15:44:12 | C drive is full and out of space | Laptop issues | Immediate | I installed Windows update and now my C drive is full. | James | Operations | james@mycompany.com.sg |
| 10002 | 10/12/2020 09:25:23 | Locked out of Windows | General password reset | Immediate | I forgot my password and I need a reset. | Emily | Finance | emily@mycompany.com.sg |
| 10003 | 10/17/2020 13:51:34 | Printer status is offline | Printer issues | I was able to print yesterday but not today. | Ryan | Human Resource | ryan@mycompany.com.sg | |
| 10004 | 10/18/2020 10:17:54 | How to set out of office in Gmail? | I can't find it in the settings. | Joyce | Business Development | joyce@mycompany.com.sg |
Ticket ID is the unique identifier. Go to cell A2 and enter this formula =ARRAYFORMULA( 10000 + ROW (B1:INDEX (B:B, COUNTA (B:B)-1))). So, for every new opened ticket, an incremental number will be assigned starting from 10001. The rest of the columns are self-explanatory.
Step 3 – Understand the Email Workflow
Staff visits ticketing system > Opens support ticket > (Google Apps Script) Responses sheet sends notification email to IT team > And sends acknowledgment email to staff
As simple as it seems, however, the To: and From: fields can be tricky. While we can deliver To: a group email with e.g., three IT staff in it, however, the From: field cannot be a group type because a user type email needs to ‘own’ the script trigger. But we don’t recommend to use ‘individual’ IT staff email here because if he/she quits the company or go for prolonged leave of absence, we will need to update the helpdesk ticketing system. Furthermore, it feels weird when you opened a ticket and receive the acknowledgement email from an IT staff account instead of a (support ticketing) system email. In this example, we assume nobody maintains the email – itadmin@mycomany.com.sg which we created for our helpdesk ticketing system. We then inform end user to use Reply to all instead. As a precaution, we can add individual IT employee emails as forwarding address from itadmin@mycompany.com.sg
Sends notification email to IT team
To: IT.staff1, IT.staff2, IT.staff3 or IT group email
From: itadmin@mycompany.com.sg
Reply to: staff email
Sends acknowledgement email to staff
To: staff email
From: itadmin@mycompany.com.sg
Reply to: IT.staff1, IT.staff2, IT.staff3 or IT group email
Step 4 – Send Email Notifications to IT Staff and End User with Apps Script
Up till now, we had setup a Google form and familiar ourselves with the Responses sheet. Within the sheet, we are going to add some JavaScript codes (Apps Script) to send out emails to both IT staff and end user whenever a new support case is logged. Go to IT Service Request (Responses) > Tools > Script editor.
function myFunction() {
var spreadsheet = SpreadsheetApp.getActive();
var responseSheet = spreadsheet.getSheetByName('Form Responses 1');
// Returns the position of the last row that has content.
var rLastRow = responseSheet.getLastRow();
// Returns the position of the last column that has content.
var lastCol = responseSheet.getLastColumn();
var values = responseSheet.getRange(rLastRow, 1, 1, lastCol).getValues()[0];
var ticketId = values[0];
//var timestamp = values[1];
var timestamp = Utilities.formatDate(new Date(values[1]), 'GMT+8', 'dd/MM/yyyy HH:mm a');
var requestSubject = values[2];
var requestType = values[3];
var requestPriority = values[4];
var requestDescription = values[5];
var staffName = values[6];
var staffDept = values[7];
var staffEmail = values[8];
emailIT(ticketId, timestamp, requestSubject, requestType, requestPriority, requestDescription, staffName, staffDept, staffEmail);
emailStaff(ticketId, timestamp, requestSubject, requestType, requestPriority, requestDescription, staffName, staffDept, staffEmail);
}
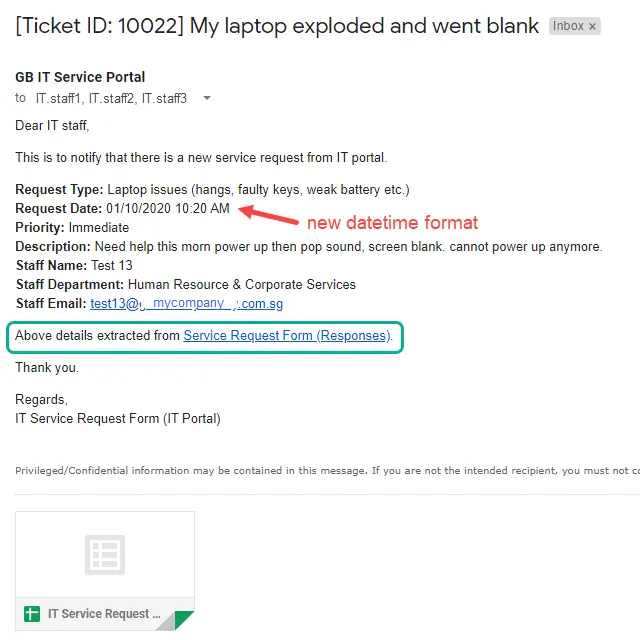
function emailIT(ticketId, timestamp, requestSubject, requestType, requestPriority, requestDescription, staffName, staffDept, staffEmail) {
var subject = '[Ticket ID: ' + ticketId + '] ' + requestSubject;
// Email Text. You can add HTML code here - see ctrlq.org/html-mail
var htmlBody = 'Dear IT staff,';
htmlBody += '<p>This is to notify that there is a new service request from IT portal.</p>';
htmlBody += '<p><strong>Request Type:</strong> ' + requestType;
htmlBody += '<br><strong>Request Date:</strong> ' + timestamp;
htmlBody += '<br><strong>Priority:</strong> ' + requestPriority;
htmlBody += '<br><strong>Description:</strong> ' + requestDescription;
htmlBody += '<br><strong>Staff Name:</strong> ' + staffName;
htmlBody += '<br><strong>Staff Department:</strong> ' + staffDept;
htmlBody += '<br><strong>Staff Email:</strong> ' + staffEmail + '</p>';
htmlBody += '<p>Above details extracted from <a href="https://docs.google.com/spreadsheets/d/<spreedsheetLinkID>/edit" target="_blank">Service Request Form (Responses)</a>.</p>';
htmlBody += '<p>Thank you.</p>';
htmlBody += '<p>Regards,<br>IT Service Request Form (IT Portal)</p>';
GmailApp.sendEmail('it.staff1@mycompany.com.sg, it.staff2@mycompany.com.sg, it.staff3@mycompany.com.sg', subject, '', {htmlBody:htmlBody, name: 'XYZ IT Service Portal', replyTo: staffEmail});
}
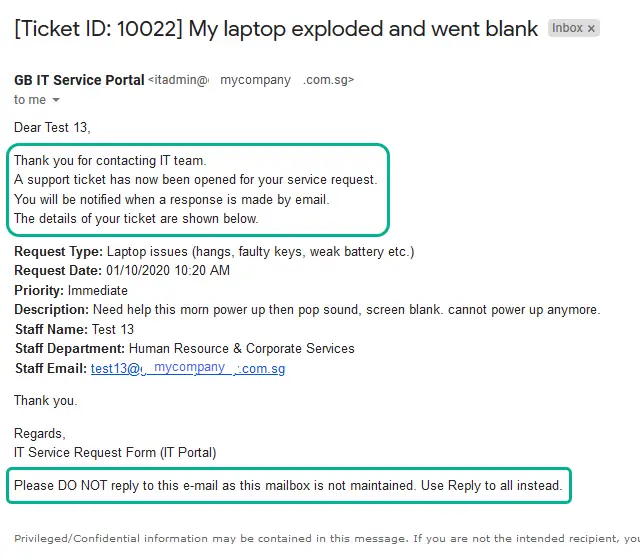
function emailStaff(ticketId, timestamp, requestSubject, requestType, requestPriority, requestDescription, staffName, staffDept, staffEmail) {
var subject = '[Ticket ID: ' + ticketId + '] ' + requestSubject;
// Email Text. You can add HTML code here - see ctrlq.org/html-mail
var htmlBody = 'Dear ' + staffName + ',';
htmlBody += '<p>Thank you for contacting IT team.';
htmlBody += '<br>A support ticket has now been opened for your service request.';
htmlBody += '<br>You will be notified when a response is made by email.';
htmlBody += '<br>The details of your ticket are shown below.</p>';
htmlBody += '<p><strong>Request Type:</strong> ' + requestType;
htmlBody += '<br><strong>Request Date:</strong> ' + timestamp;
htmlBody += '<br><strong>Priority:</strong> ' + requestPriority;
htmlBody += '<br><strong>Description:</strong> ' + requestDescription;
htmlBody += '<br><strong>Staff Name:</strong> ' + staffName;
htmlBody += '<br><strong>Staff Department:</strong> ' + staffDept;
htmlBody += '<br><strong>Staff Email:</strong> ' + staffEmail + '</p>';
htmlBody += '<p>Thank you.</p>';
htmlBody += '<p>Regards,<br>IT Service Request Form (IT Portal)</p>';
htmlBody += '<p>Please DO NOT reply to this e-mail as this mailbox is not maintained. Use Reply to all instead.</p>';
GmailApp.sendEmail(staffEmail, subject, '', {htmlBody:htmlBody, name: 'XYZ IT Service Portal', replyTo: 'it.staff1@mycompany.com.sg, it.staff2@mycompany.com.sg, it.staff3@mycompany.com.sg'});
}
function myFunction( ) – Extracts the last row of data into array values. values[0] is column 1, values[1] is column 2 and so on and so forth. The Responses sheet stores the Timestamp as 10/2/2020 15:07:18 but this will appear as Mon Sep 28 2020 11:26:20 GMT+0800 (Hong Kong Standard Time) in the email. Hence, we format the date with Utilities.formatDate( ) to appear as 02/10/2020 15:07 PM instead. From this function, we pass the form values collected as parameters to two email functions.
function emailIT( ) – Sends out an email to the IT team. The email subject is hard-coded to [Ticket ID: 10001] Subject where 10001 is the result of the formula mentioned in Step 2 and Subject equals to the answer from the ‘Subject’ question in the form in Step 1. The rest of the content is self-explanatory with each line representing one question in the Google form. We also include the Service Request Form (Responses) link at the bottom to give IT staff one-click access.
function emailStaff( ) – Sends out an email to the staff who opened the support ticket. The top content is slightly different as we inform end user that IT received their ticket while the mid content remains largely the same. Lastly, we exclude the responses sheet link to end user.
In order to activate these functions on form submit, go to Current project’s triggers > + Add Trigger > myFunction / Head / From spreadsheet / On form submit > Save
Conclusion
So, we had built a simple support ticketing system using a Google Forms and its responses sheet with Apps Script. The advantage of this system is cost savings because we do not spend money on subscriptions or hosting. Although other ticketing systems comes with more functionalities but they also have a steeper learning curve. Changing culture within an organization is difficult but if this ticketing system ever gets adopted, then IT may consider to upgrade to a proper helpdesk ticketing system then. For reporting purposes, the responses sheet provides a summary breakdown of each questions. For example, a pie chart is used to display the contribution of each drop-down options for the ‘Request Type’ responses. This is useful for the IT supervisor to report to the management, e.g., the top three common issues that staff open tickets for. Finally, this is a good time to show that the IT team is self-reliant even if the company is dependent on outsourced IT support services.
Is it possible to view the last cells data spreadsheet in form response without scrolling the spreadsheet?
I just wanted to let you know that this code rocks, I was able to learn how to use this because you outlined it so well. It made this concept very easy to learn and thank you for creating this tutorial.