Introduction
Raise your hand if you ever need to capture your screen and email the screenshot out as attachment or send it via WhatsApp Web. I am sure that more than 90% of the readers here will raise their hands. The traditional way to capture a screenshot is to hit the PrtScn (Print Screen) key, well at least, that is what my wife does. I ditched this method a long time ago because it is bothersome to then open a graphic editor program to crop the image. And I also need a graphic editor that is able to do simple editing like draw shapes/ arrow, write text and reduce image sizes. I had installed Adobe Photoshop previously but it was overkill for my needs. The steep learning curve coupled with the physical memory and CPU resources consumption were too much for my liking.
Snagit Image Capture
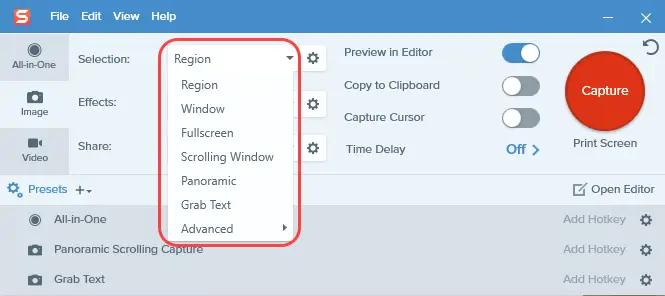
The Selection drop-down allows us to capture a region, windows, full-screen or scrolling windows etc. The Effects option is useful, for example, if we select ‘Watermark‘, then our selected signature will be auto applied to all captured screenshots. Then, there are others like Share and Time Delay which I don’t use them at all.
Snagit Video Capture
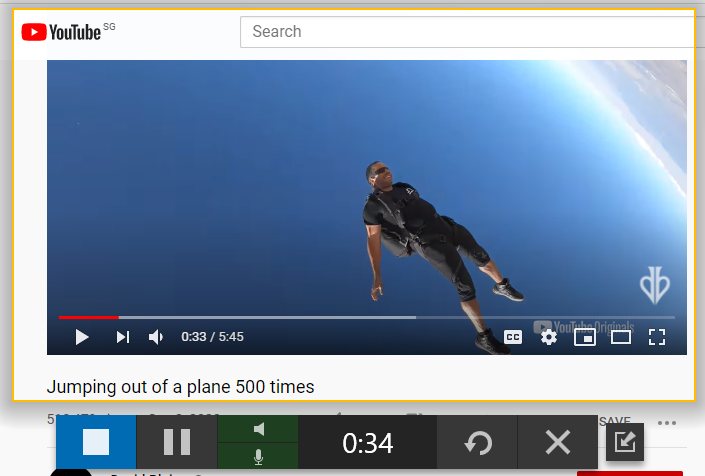
Most of us install Snagit because of its screen capture capabilities and the powerful, yet easy to use image editor. However, Snagit is also a recording software that lets you record yourself working through steps for an instructional video. One can also grab individual frames out of a recorded video or even record a section of a playing YouTube video.
7 Reasons on Why Snagit Editor is So Useful
It meets all my requirements in the simplest way! Snagit is a screenshot plus graphic editor program developed by TechSmith. Some key features include all-in-one capture, screen recorder, animated GIFs and share anywhere. For example, Snagit lets you quickly capture a process on screen, add explanations and create visual instructions using the graphic editor before sharing it with friends or co-workers using the share feature.
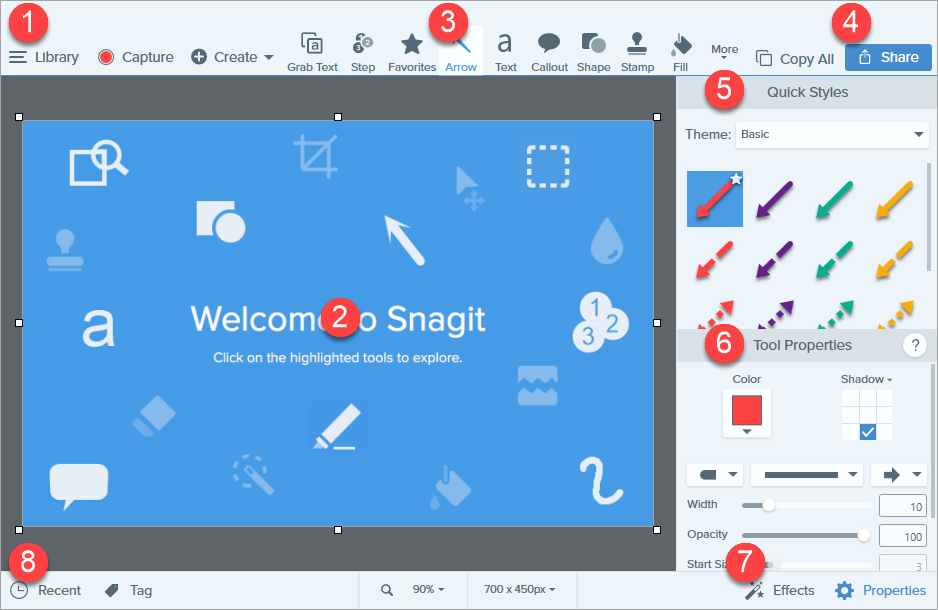
1. UI is easy to navigate and simple to understand
On first look, one can see that the UI does not overwhelm the user with tons of clustered icons. The basic tools are listed on the top in a horizontal row. When a particular tool is selected, the quick styles and tools properties are loaded on the right sidebar and again the options are kept to a minimum.
2. If you aren’t a graphic designer, then these tools are enough
I got to admit that I am not and will never be one although I did try to learn photo editing using Adobe Photoshop but I gave up very quickly. These days, I do stuffs like draw arrows, add shapes and write text on image captures, I mean who doesn’t? And looking at the set of tools that Snagit provides, it be good enough for a novice ‘graphic editor’ like myself. The most frequently used tools for me are Arrow, Text, Shape, Fill and Selection (for cropping).

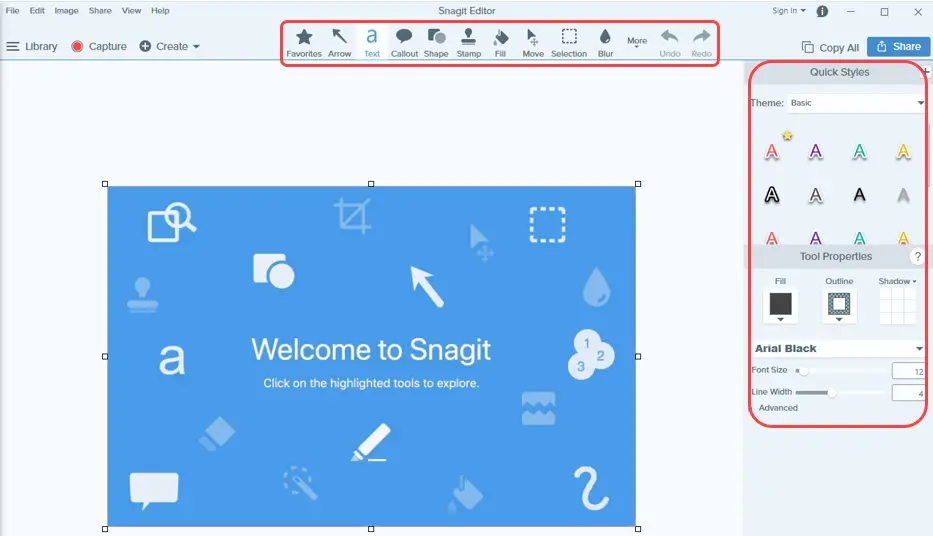
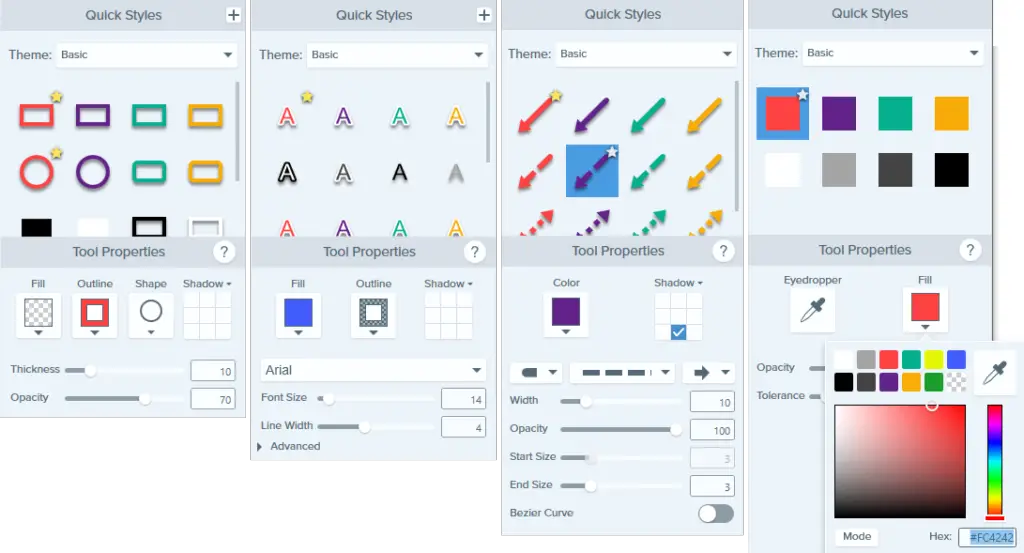
3. Tool properties are clearly expressed and uncomplicated
From left to right, we have shapes, text, arrows and fill. At the top, there are some Quick Styles where one can just click and start editing with the applied style or adjust the selected quick style to suit your needs from Tool Properties. The entire layout as you can see are well organized and comes with sliders to test your image on-the-fly.
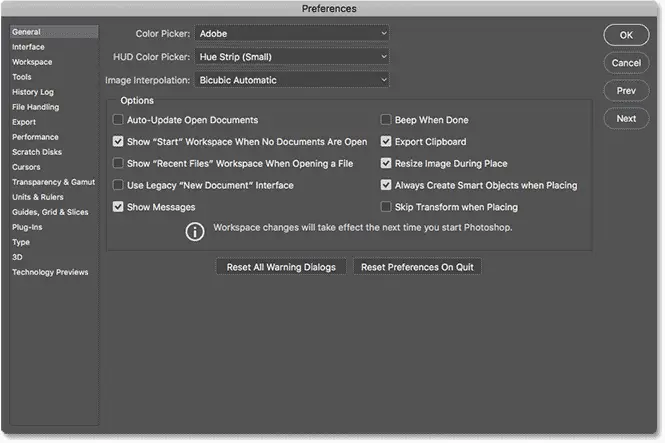
4. Editor preferences does not startle user with too many options
This is indeed true and I personally think this is a good thing. The editor preferences have so little options to tweak that I just use the default setup after installation. To compare Adobe Photoshop preferences (left) to Snagit editor preferences (right), is like pitting a Ferrari against a general-purpose car!

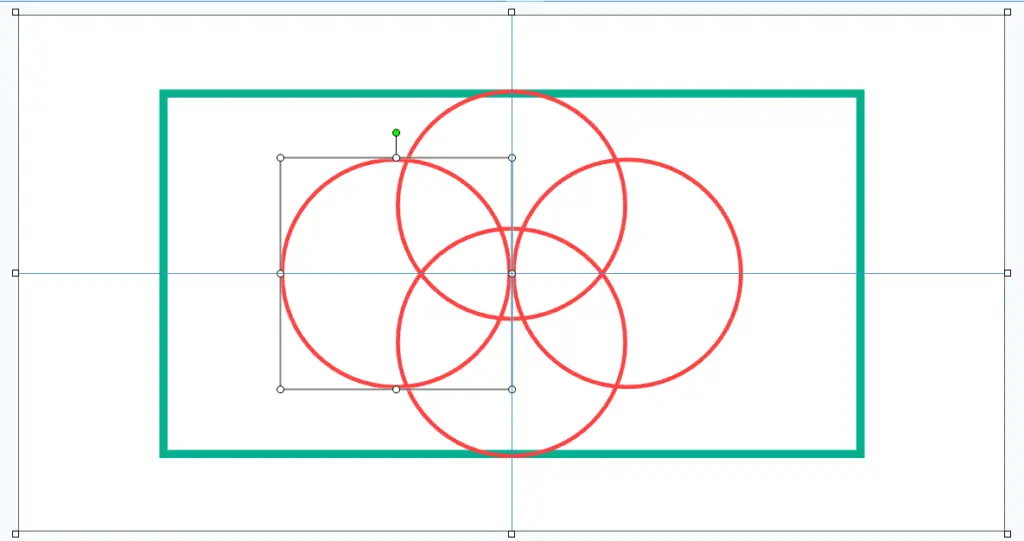
5. Supports canvas snapping
Canvas snapping is so useful that I used it 9 out of 10 times for my image editing these days. Call me weird but for every graphics that I placed on the canvas; it will have to snap to some points associated with another graphic or the canvas itself as I like to position them proportionally over the canvas.

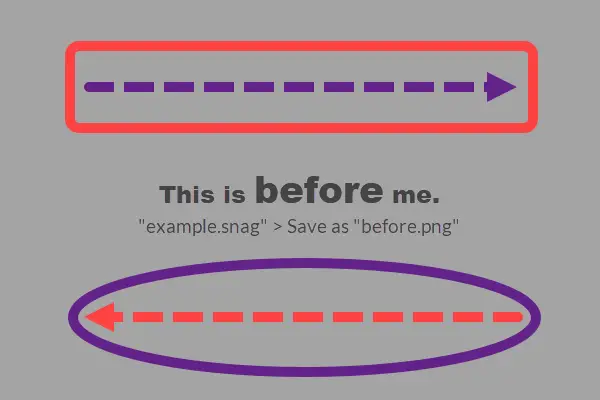
6. Save as SNAG – Snagit Capture File (*.snag)
This is the native layered image file format for Snagit. While I had used Snagit for some years now, I only discovered and apply the usage of this file format in recent months. The huge benefit is that one can open the saved (*.snag) file at a later time and do modifications such as changing fill colors, shifting shapes, modify text and remove lines/arrows. This is equivalent to Adobe Photoshop own format (*.psd).
7. Recent captures tray to recap recent images
Another thing I like about Snagit is the quick access to recent images which were opened and save as under Snagit editor thus they can originate from various folders. This means that an image that was created e.g. 1 month ago will be there for you to quickly access to it. This is particularly useful if you want to create a new image and wishes to use the previous one as reference.

Other handy features you probably forget to use
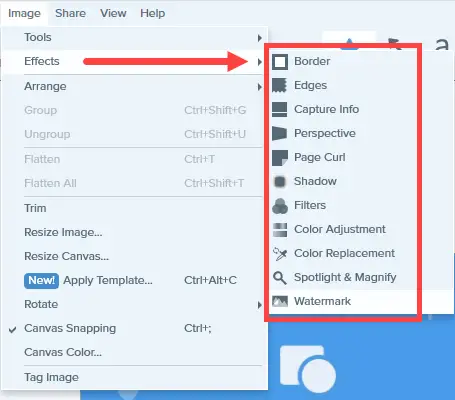
Image effects (left) – While I don’t use any effects on my images, both ‘Border‘ and ‘Watermark‘ could come in handy one of these days.
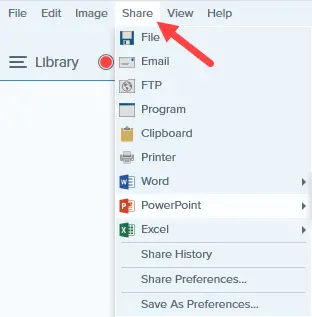
Image sharing (mid) – Once you are done with your images, you may want to one-click open it in Microsoft Word or PowerPoint. Other possible sharing options include Email as attachment and upload to any FTP server set up by you.
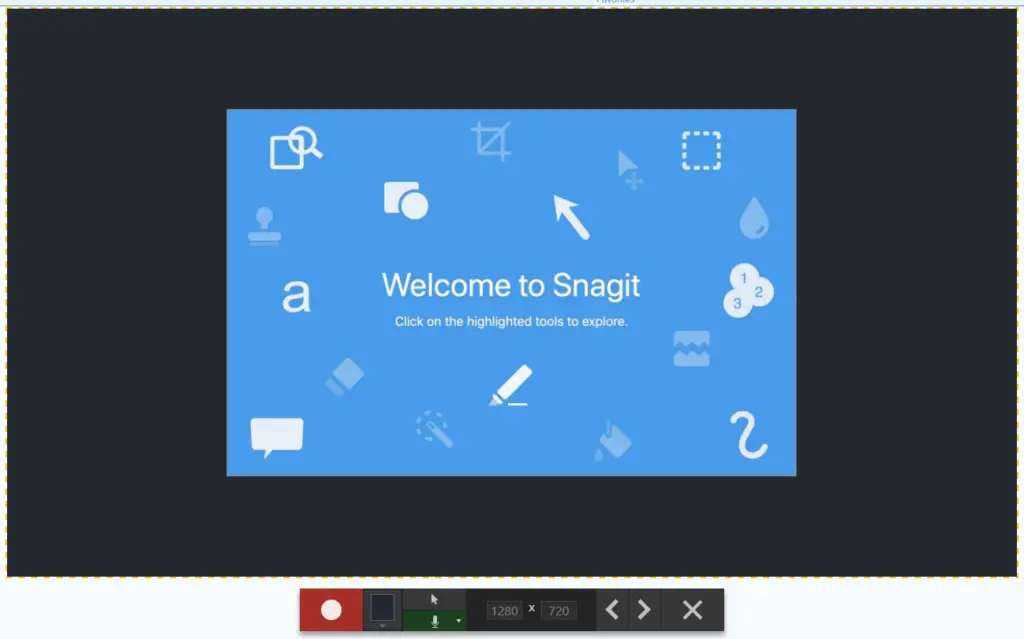
Create video from images (right) – This is a slideshow made out of a series of images. Press the start recording button and one can add voice or draw or type live on the image in the live recording. Click < and > to continue to record previous or next image.
Greenshot – Free and open-source Snagit Alternative
After a couple of months into Snagit, I took a break to start searching online for a free screen capture software and found that ‘Greenshot‘ was mentioned a couple of times in Reddit. I love open-source initiatives and for that reason, I downloaded Greenshot to give it a try. My first impression was that it is a light-weight software with a slim UI. On closer examination, it can capture region, window and full screen plus it also have an editor like Snagit. The main differences I feel are that the overall UI is not as intrusive as Snagit hence it loses out on user experience. Second, the editor is not as feature-packed as Snagit editor though both have some similar functions such as drawing shapes and arrows. Therefore, Greenshot does feels like a downgrade to me. Don’t get me wrong, it is still a good piece of software that cost you nothing but still gets the job done.
Conclusion
The pricing for Sangit individual cost $55 USD per license at the time of this writing and it is a one-time fee. In my opinion, this is pricey and does not justify if user only wants to do simple screen captures while ignoring the editing portion. It is worthy to note that Greenshot does comes with its own editor and native file format as well. While I still recommend Snagit for its simplistic editing features and everything else, I had to take 1 star away due to its price.