Introduction
Due to the COVID-19 pandemic, many companies are forced to embark on the digital transformation journey. One marketing trend is the use of 360 virtual tours to bring visitors back to places of attractions on the web. But virtual tours are not all 360 videos and can include panoramas as well. As part of the IT team in a garden attraction, I was asked to join a work-group that will explore the use of such ‘interactive’ 360 videos to gather people who are interested in horticulture and willing to pay for a live show. Having read through many 360 virtual tours software reviews, I decided to try out 3DVista Virtual Tours because it was available on desktop and it was mentioned to be easy to use.
Prerequisites
- 3DVista Virtual Tour software
- A mobile phone capable of taking panorama images or download Panorama camera app from Play store.
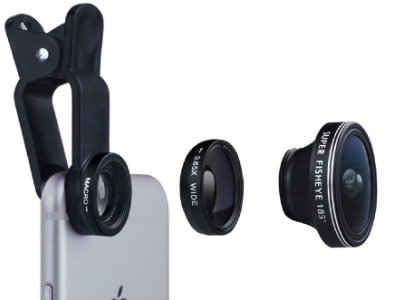
- (optional) Fisheye lens attachment for mobile
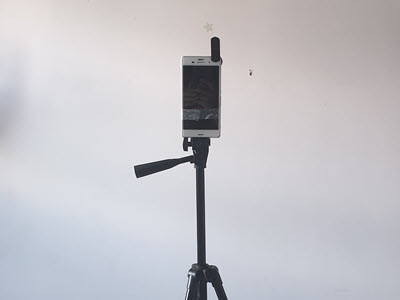
- (optional) Tripod
- (optional) Web server for hosting published 360 videos.
Step 1 – Take Panorama Photos at Different Locations (Rooms)
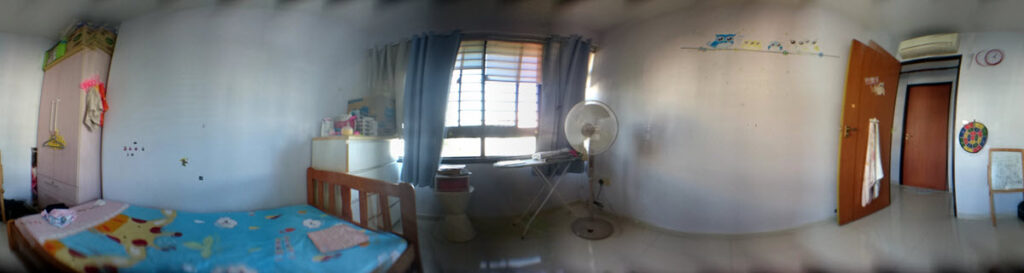
Go to a starting location, for example, the living room and place the tripod at the center. Activate your mobile camera and start to capture a panorama in a 360 rotation which I completed in about 25 seconds. Review and save the panorama. Repeat the same for kitchen, corridor and bedrooms in a similar fashion. Finally, transfer all the panorama JPG files to your local storage where 3DVista Virtual Tours can import them.
Step 2 – Start a New Project, Select a Skin, Import All Panoramas
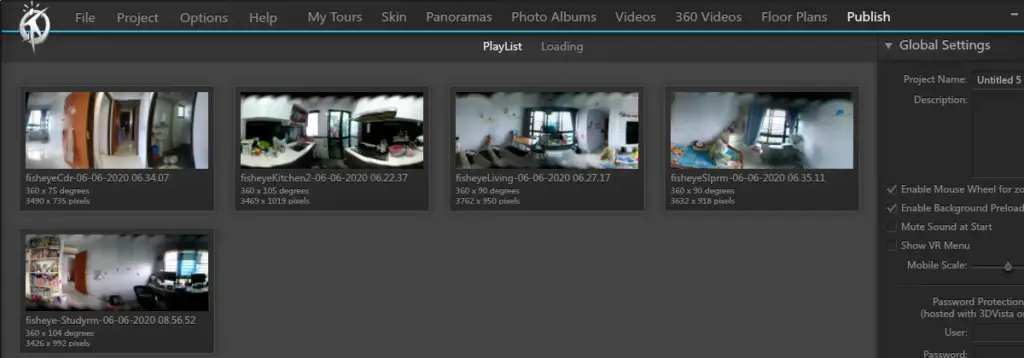
Select a skin. I would recommend Circle Border if you plan for audiences viewing on a desktop, then the player controls and panorama sidebar will be useful else choose Empty for mobile viewing because I find that the panorama sidebar is a hinder to small mobile screen and with fingers gestures available on mobile, the player controls become redundant. Next, we select Import Panorama from the Add Media menu and select Standard Panorama. Holding Shift key, we can select multiple panoramas for import. Don’t worry about the Playlist sequence because we can click and drag any panoramas and reorder them later.
Step 3 – Add Hotspots to Panoramas
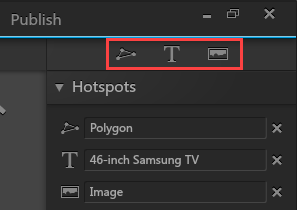
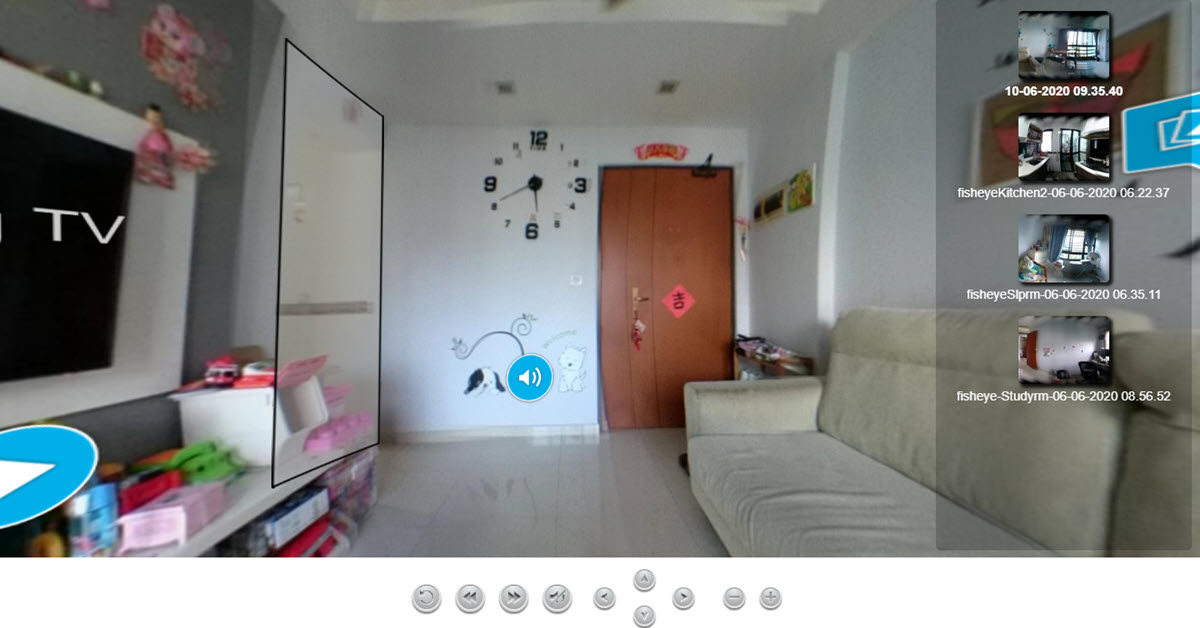
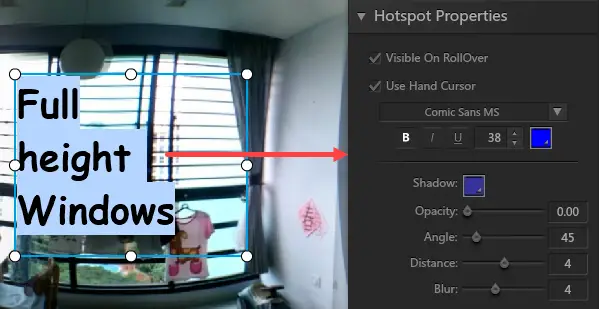
Go to main tab Panoramas and select Hotspots. The first Polygon symbol is mainly used to craft out the entrance and exit for each room. The ‘T’ symbol is to add always visible or RollOver text on objects of interest. The last landscape image is to add clickable icons where videos and audio sounds can be played or blown-up image to be displayed etc. Some hotspot examples below include playing a recorded video of fishes swimming when visitor click on the play button at the fish tank and displaying the size and brand information of the 46 Inch Samsung TV.
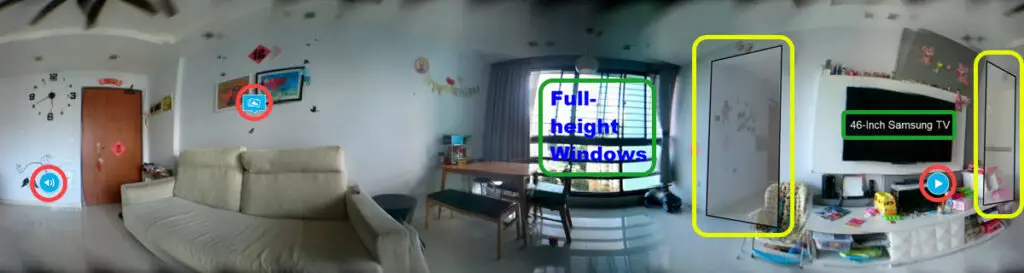
There are many interactive and informative details you can create as hotspots on a panorama. The reds are pop-up images, videos or audio. The greens are text-like information and the yellows are doorways to another connecting panorama.
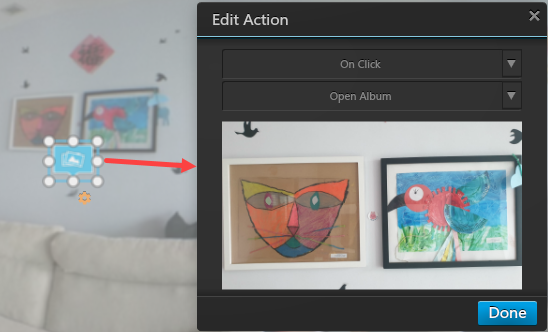
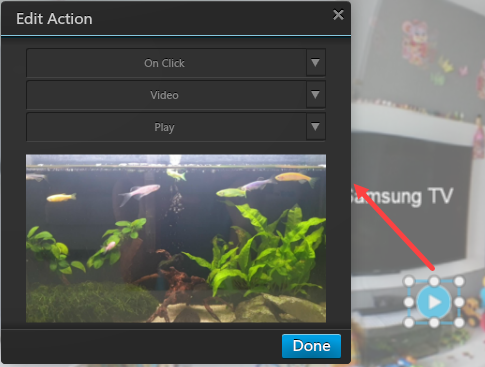
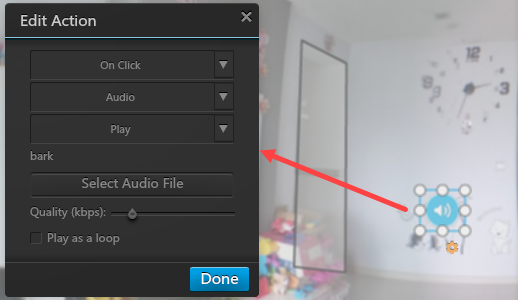
We can select one of the three actions to activate a hotspot: On Click (mouse click), On Rollover (mouse over) and On Rollout (mouse out). We can select On Click which I feel is more user-friendly as this allows the visitors to choose and click which hotspots they want to interact with. When we add a media to a hotspot, 3DVista will prompt “Do you want to add media into the carousel?“. The answer should be No because if we choose Yes, then what will happen is that whenever we click on an image hotspot, the image will open followed by another media e.g. video will start to play etc. In short, all the media added to the carousel will start to play in sequence.
Step 4 – Connect to Other Panoramas with Polygon Hotspot
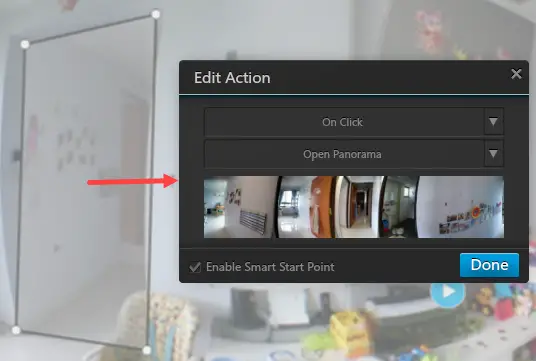
After we select Polygon hotspot, we click on four points (e.g. four corners of a doorway) and 3DVista will denote the enclosed grey area for us to enable certain action. We will select On Click and Open Panorama to import another panorama which will be another room or section where we want the visitors to go to. Check Enable Smart Start Point which calculates where visitors are coming from to give them a corresponding ‘entry view’ for the imported panorama as if they are actually walking in there.
Repeat Step 3 to add various hotspots to all panoramas and then Step 4 to connect all of them together into a panoramic virtual tour.
Step 5 – Preview and Publish


Hit Preview and navigate around to check all hotspots. When we are satisfied with the results, we do want to Publish for visitors to enjoy our mini 360 panoramic virtual tour! In this tutorial, we will use For Web and upload the generated files and folders to our web server. This was tested on a nginx server and no special config or Linux packages is required. All we need to do is to FTP transfer the files to the web directory.
index index.htm index.html index.php;Do remember to add index.htm as part of the index directive. Finally, we can share the URL with your friends and relatives, tell them to come visit your home.
Conclusion
Videos and cameras are never my area of expertise or interest thus I was quite confused with all the different kinds of 360 videos presented on YouTube and write-ups. However, I quickly gained interest when I learned how easy a 360 panoramic virtual tour can be made. I shortlisted a couple of commonly mentioned virtual tour software such as Matterport, KRPano and Pano2VR that are available on cloud and desktop. I had chosen 3DVista because it can be installed locally on my desktop without paying for monthly cloud subscription.
After playing with 3DVista, I find that it is very easy indeed to create hotspots on panoramas and combine them into a virtual tour. While the software does not have tons of customizable features, it does offer, for a newbie like me, a clean and simple interface to navigate. The published video files do not require additional 3rd party packages or specially configured web server to play from the browser. Another advantage is 3DVista can also process a normal 360 video in a way that the published content will change view angle as you tilt your mobile. Therefore, I highly recommend 3DVista Virtual Tours for amateurs and semi-pros.