After getting the keys to my new home, a certain thing is always on my mind during renovation and it was network planning. I am a PC gamer having spent most of my time on online games thus low network latency is of critical importance to me. Wired network is what I use for gaming along with my trusted wired keyboard and mouse. No wireless!
Unlike some of my peers whom dislike the sight of PVC trunking in their home, I thought otherwise. For me, every room must have LAN port access with a designated room connected back to living room where the ONT is. With that in mind, I engaged a contractor and went to my local electronics mall (Sim Lim Tower) to buy him a roll of Cat6 Ethernet cable to run the cabling in my new home.
Initial – Typical and Idiot-proof Setup
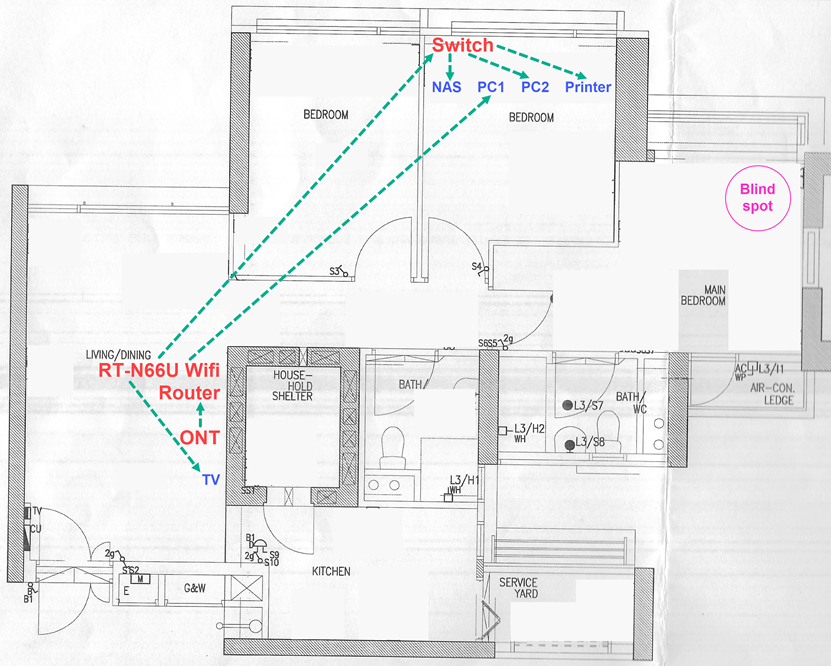
I lived with this setup for one to two years. It was a simple setup in which a switch was deployed to extend connectivity to multiple PCs and devices in my study room. The contractor had run two network connections from living room to study room, thus I connected my gaming desktop (PC 1) directly to the RT-N66U router because the switch will be additional hop. My smart TV was connected to the router as well because they are near each other. However, I had very weak WiFi strength (40%) in my main bedroom and there was even a blind spot at the corner where I sleep.
Improved – Shifting WiFi Router to Improve Coverage
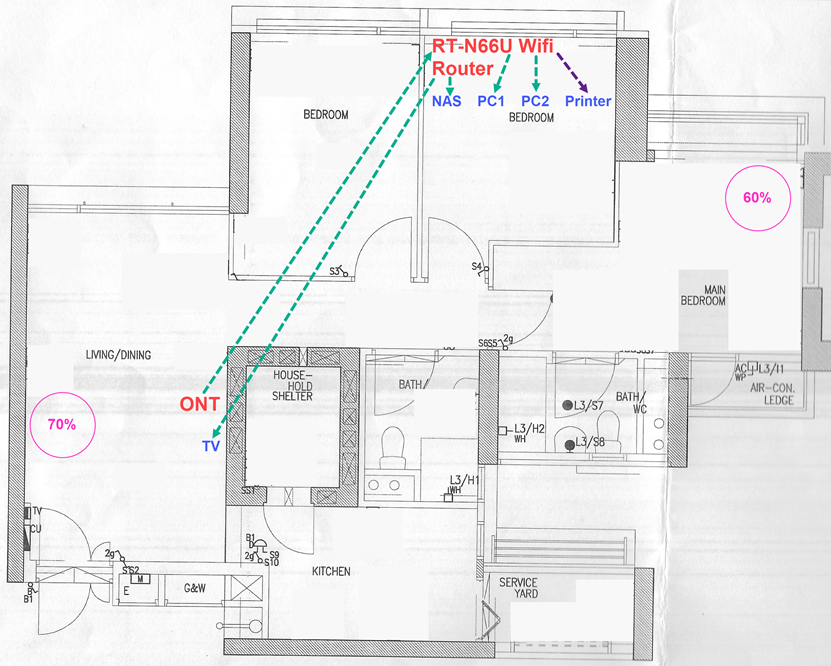
So one day, I decided to re-design the network by moving the WiFi router to a more centralized location in the house. The router was moved from the living room to the corner of the study room and the switch was eliminated from the network. All PC 1, PC 2 and NAS were connected to the router instead through wired LAN while the printer operated in WiFi mode. Back to the main bedroom, the general signal strength improved from 40% to 80% while the blind spot (no longer blind) had 60% coverage. However, the WiFi strength in the living room dropped to 70% which was still acceptable.
Final – Optimal Setup with WiFi Router and Access Point (AP)
Another one to two years later, WiFi extenders being affordable and easy to deploy became very common in households. This led me to think if I could again improve and achieve near perfect wireless coverage in every corners of my home. I researched online for the optimal network setup and the term access point (AP) appeared many times to compare against the use of WiFi extenders. It was said that the bandwidth will be halved if using extenders hence I was immediately sold on AP!
Free router for every new fibre broadband sign up was a norm in my country, Singapore. I asked my dad for his spare D-Link 868L router since he had already upgraded to a new wireless AC router. I am contented but definitely not over the moon with this 868L router because AC routers capabilities had already advanced over the years. One advantage this 868L has over my current RT-N66U is that it supports 802.11ac vs 802.11n. Another confirmation that 868L was a more advanced router was it came equipped with USB 3.0 port vs RT-N66U 2.0 port.
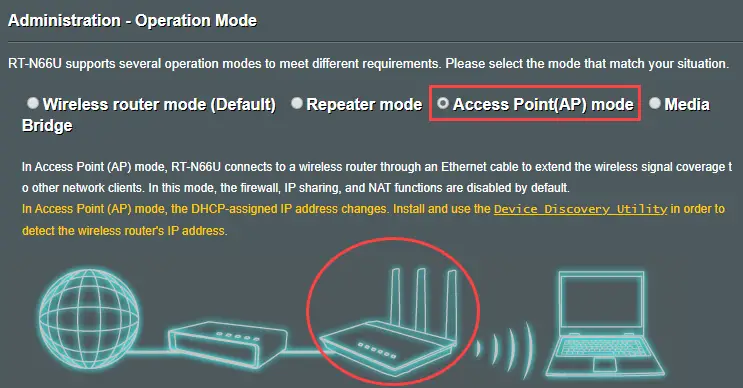
Thus, I decided to connect 868L (the better router) to the ONT in the living room. I do spend majority of my time using mobile on WiFi in the living room and being connected to 802.11ac will be advantageous. The RT-N66U which is now in AP operation mode had improved my master bedroom WiFi in the previous setup so I am going to just leave it where it is.
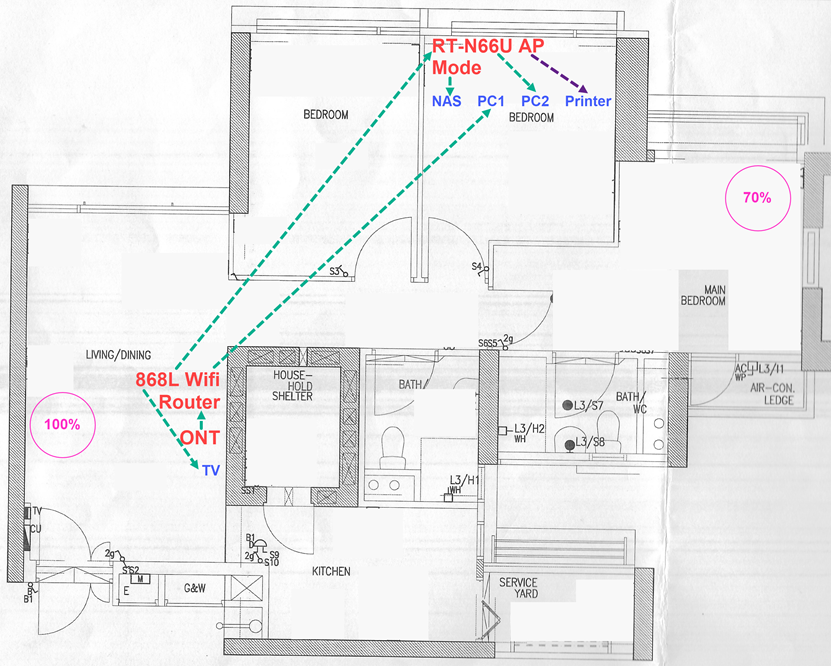
Conclusion
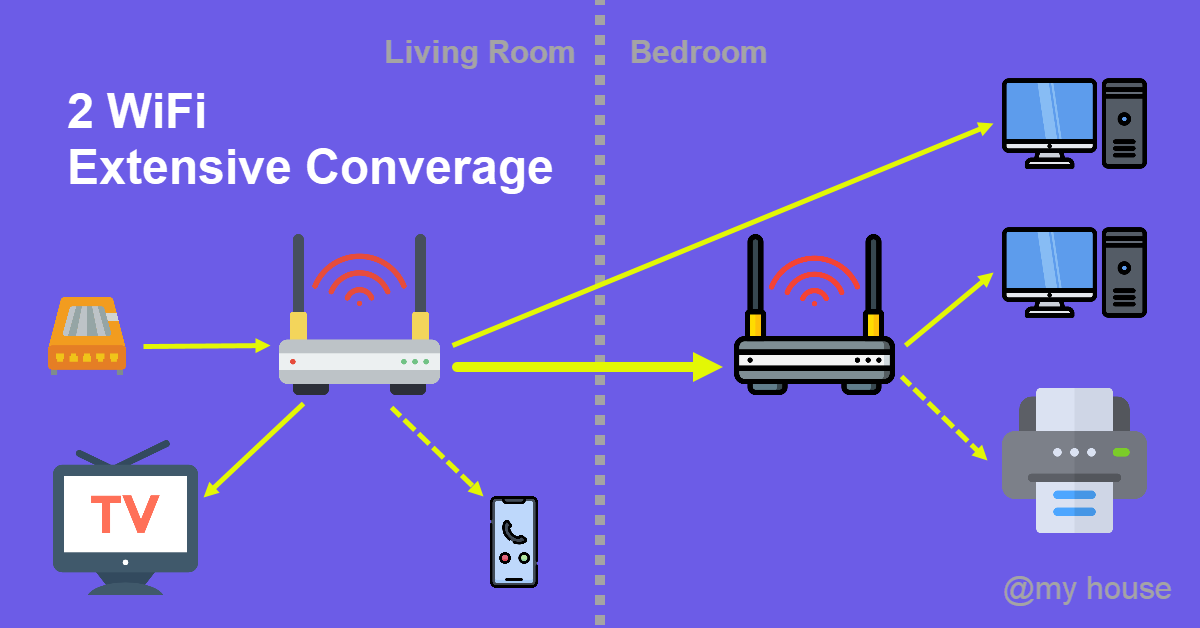
I felt that I had obtained the best network setup possible with available hardware without spending a dime. I got 2x WiFi networks (868L and RT-N66U) to cover my entire home. The smart TV in the living room which frequently runs YouTube for the kids and my gaming desktop (PC 1) are both connected to the immediate router 868L (least network hops). In all these setups, I installed android app Wifi Analyzer on my mobile to test the WiFi strength at ‘high WiFi usage’ locations e.g. sofa and bed. The app also helped to make optimal adjustment of the 3 external antennas on RT-N66U to further squeeze that extra bit of coverage through trial and error.